How to setup Ozeki VoIP SIP SDK with FreePBX
This guide shows how you can connect Ozeki VoIP SIP SDK to your FreePBX. This solution gives you a brief explanation about how you can configure Ozeki VoIP SIP SDK to start building your own application.
Ozeki VoIP SIP SDK uses Voice over IP to establish phone calls. Using VoIP technology is less expensive than traditional phone services. With Ozeki VoIP SIP SDK you can view your registered phone line and your active phone calls. You can establish calls using the Softphone of the Demo Application. You can also select the codec to be used during the phone call.
This configuration guide demonstrates how you can connect Ozeki VoIP SIP SDK to your FreePBX.
System architecture
If you follow the configuration guide, you will have a telephone system that works
as follows:
First, create an extension in your FreePBX. Ozeki VoIP SIP SDK
will connect using this created extension. Once Ozeki VoIP SIP SDK Studio is connected, you can
start your calls. The destination phone
could be a VoIP phone, a land line phone or a mobile phone. You can see this process in
Figure 1.

- Ozeki VoIP SIP SDK registers to FreePBX.
- The call will be forwarded to FreePBX using the created extension.
- The destination phone will be ringing.
- You can start talking using the SDK.
Configuration steps
Before you start to configure this solution it is assumed that you have already installed your FreePBX and downloaded Ozeki VoIP SIP SDK installer from the download page.
Step 1.) Configure FreePBX
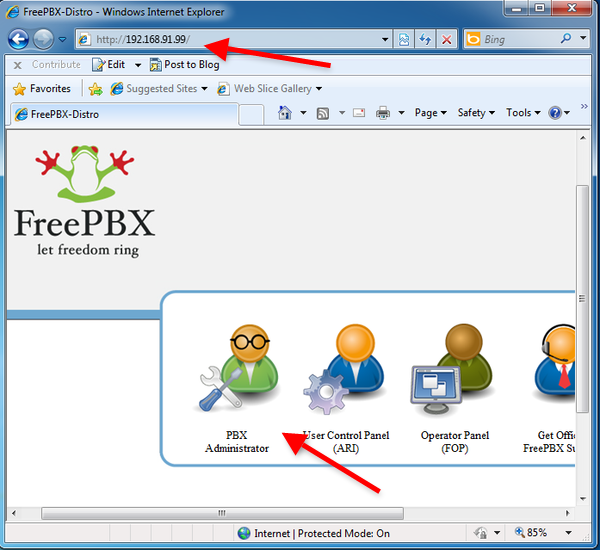
In this example I have installed FreePBX on a computer and its IP address is 192.168.91.99. You can reach and configure FreePBX through its web interface. In order to configure FreePBX navigate to the IP address of your installation using your web browser and click on the PBX Administrator icon (Figure 2).
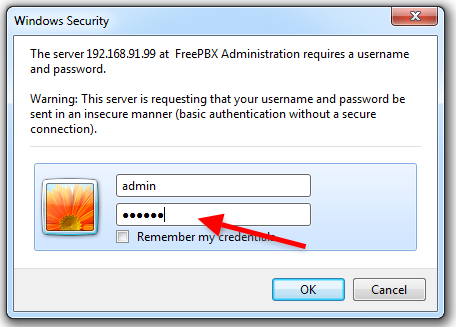
Login with as administrator with password you set during the installation (Figure 3).
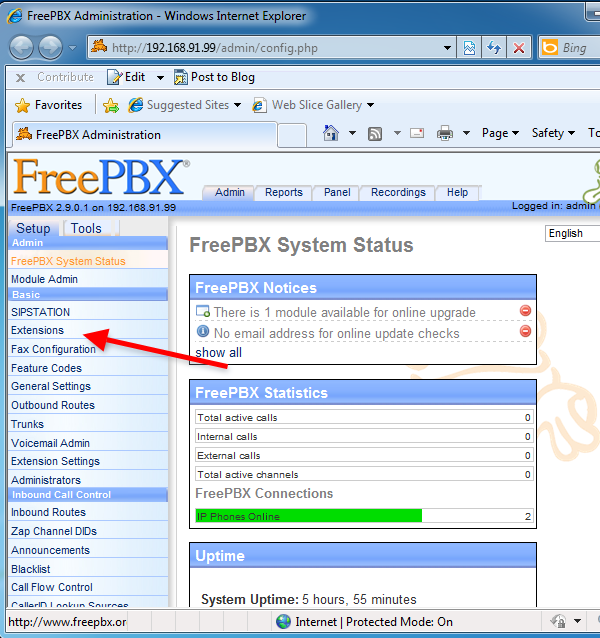
Once you logged in, click on Extensions (Figure 4).
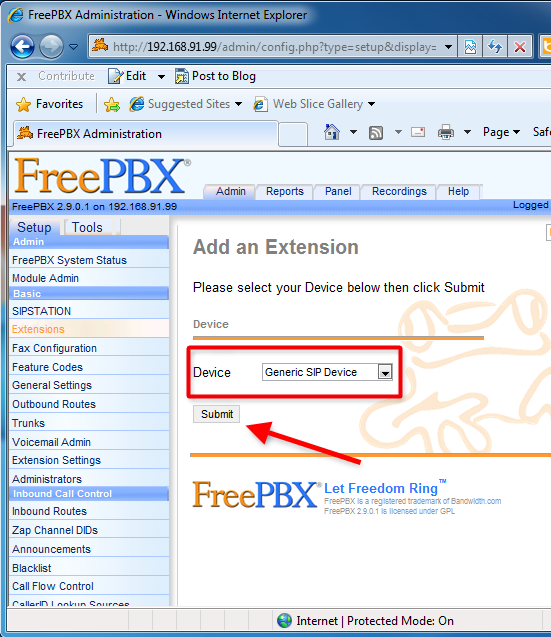
Now you can add an extension to your configuration. To do this, select Generic SIP Device from the Device list and click on Submit (Figure 5)
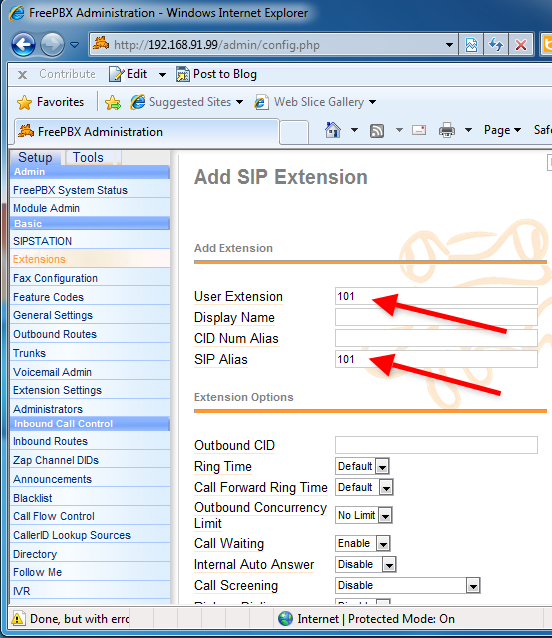
Fill the User Extension, Display Name and the SIP Alias field, and scroll down the configuration form (Figure 6).
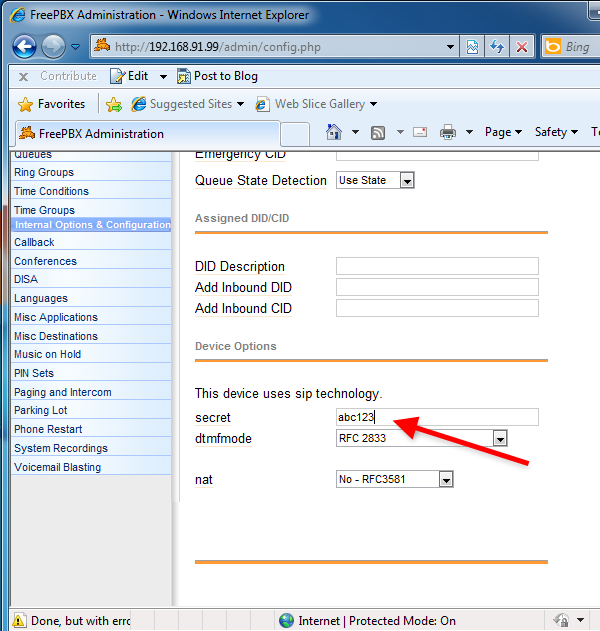
Provide the SIP password at the secret field. In this example it will be abc123 (Figure 7).
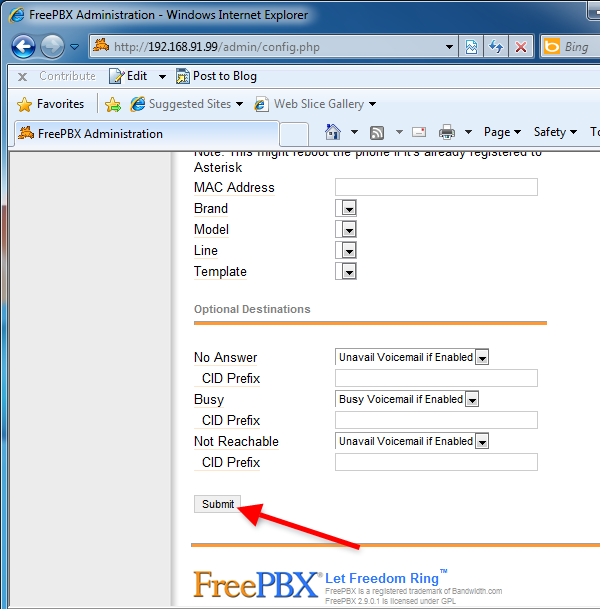
Once it is done, click on Submit (Figure 8).
To apply the new extension, click on Apply Configuration Changes at the top of the page (Figure 9).
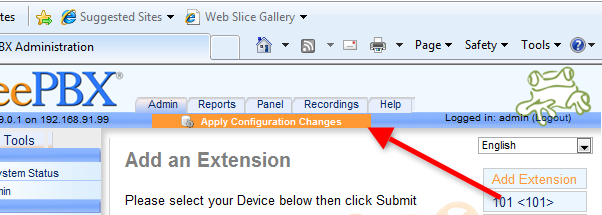
The changes will be applied by reloading the config file of the PBX. Click on Continue with reload.
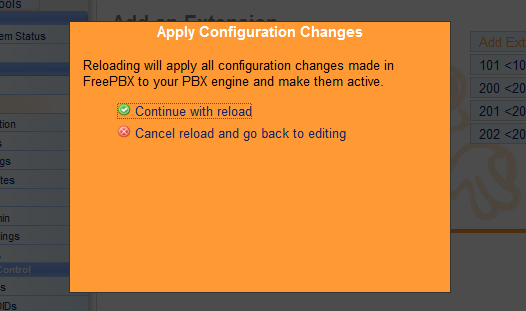
Once it is reloaded, the configuration of FreePBX is done and you can configure Ozeki VoIP SIP SDK.
Step 2.) Configure Ozeki VoIP SIP SDK
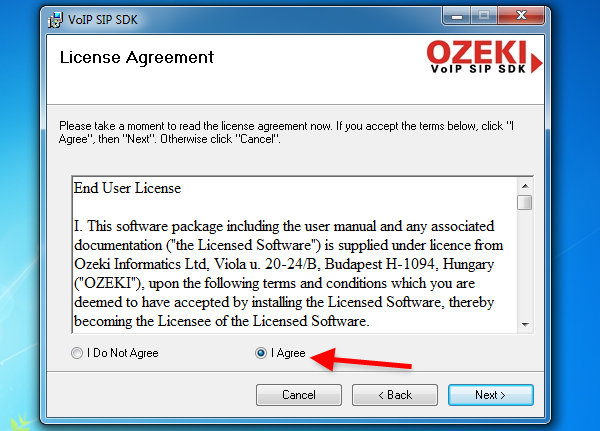
In this example, I have already downloaded the installer into my computer from the download page. Open the downloaded package and execute the installer. Accept the License Agreement and click on Next (Figure 11).
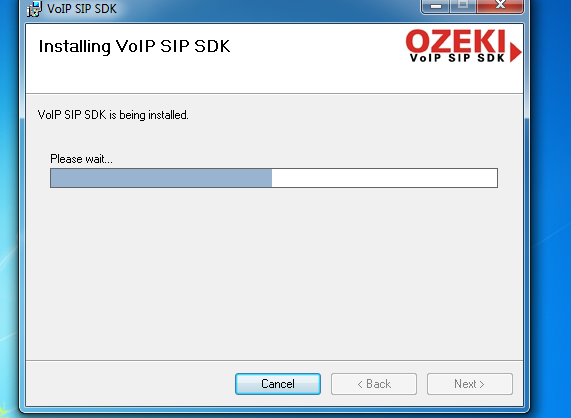
Wait until your Ozeki VoIP SIP SDK is installed (Figure 12).
After installation, Ozeki VoIP SIP SDK Demo Application will be started automatically. To provide your FreePBX extension details in the Demo Application, fill the SIP Account Settings fields with the created extension data and click on Register. (Figure 13).
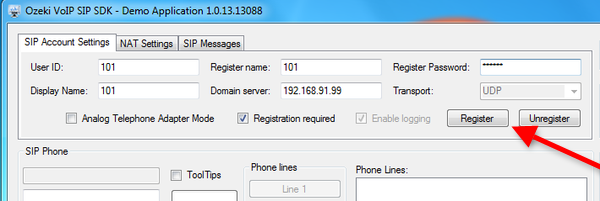
After registration, the registered phone line will be visible in the Phone Lines section. For testing you can enter a number using the form and click on Pick up (Figure 14).
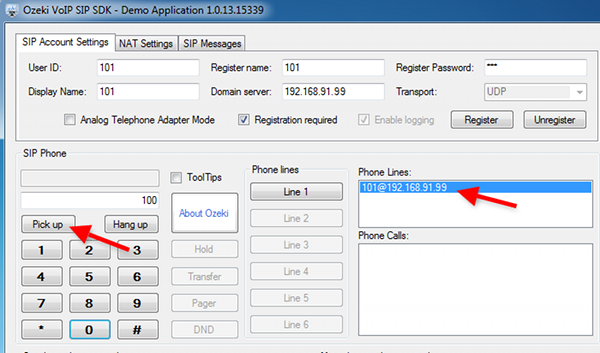
On Figure 15, you can see the Demo Application is calling the destination phone.
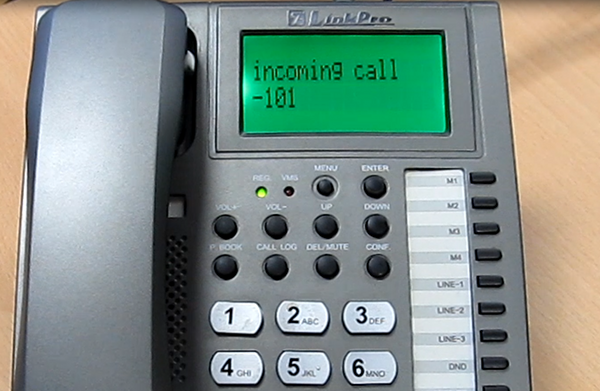
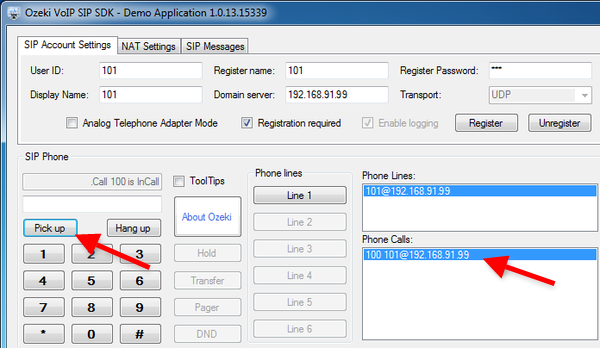
The active phone call is visible in the Phone Calls section (Figure 16).
Conclusion
Now the configuration is completed and the testing is successful. Now you can start to build your application with VoIP support. You can reach people at the lowest price possible using a VoIP system.
If you have any questions, do not hesitate to contact us: info@voip-sip-sdk.com
