Installation steps
This is a step by step guide on how to install Ozeki VoIP SIP SDK on your computer. After following this page you will be able to start creating your own VoIP solutions using Ozeki VoIP SIP SDK.
Related: Android VoIP SDK Installatin Guide: If you wish to build VoIP applications for Android Mobile Phones, you might also be interested in a similar document, the Ozeki VoIP SDK for Android Installation Guide
Download VoIP SIP SDK
The first thing to do if you wish to work with Ozeki VoIP SIP SDK, is to download and install it on your Windows computer. Once installed, you can use Visual Studio to add Voice and Video call capabilities to your project.
Link: Download Voip SIP SDK for Windows
Introduction
Installation is a very important process when you start using a program. The installation of a program is the act of putting the program onto a computer system so that it can be executed. In most cases other things (drivers, plugins) are installed at the same time that are necessary for the program to work properly.
Installation usually implies that once installed, the program can be executed again and again, without the need to reinstall before each execution. Installation guides describe the installation process step by step. In some software solutions, when running the install file of a program, these steps are also shown, one after the other. You only need to follow the instructions.
Ozeki VoIP SIP SDK is a professional software, and its installation is not complicated at all. This page contains the necessary installation steps to take before start using Ozeki VoIP SIP SDK.
Installation steps
The installation of Ozeki VoIP SIP SDK is very easy with the installation wizard. The following screenshots will help you do the process properly.
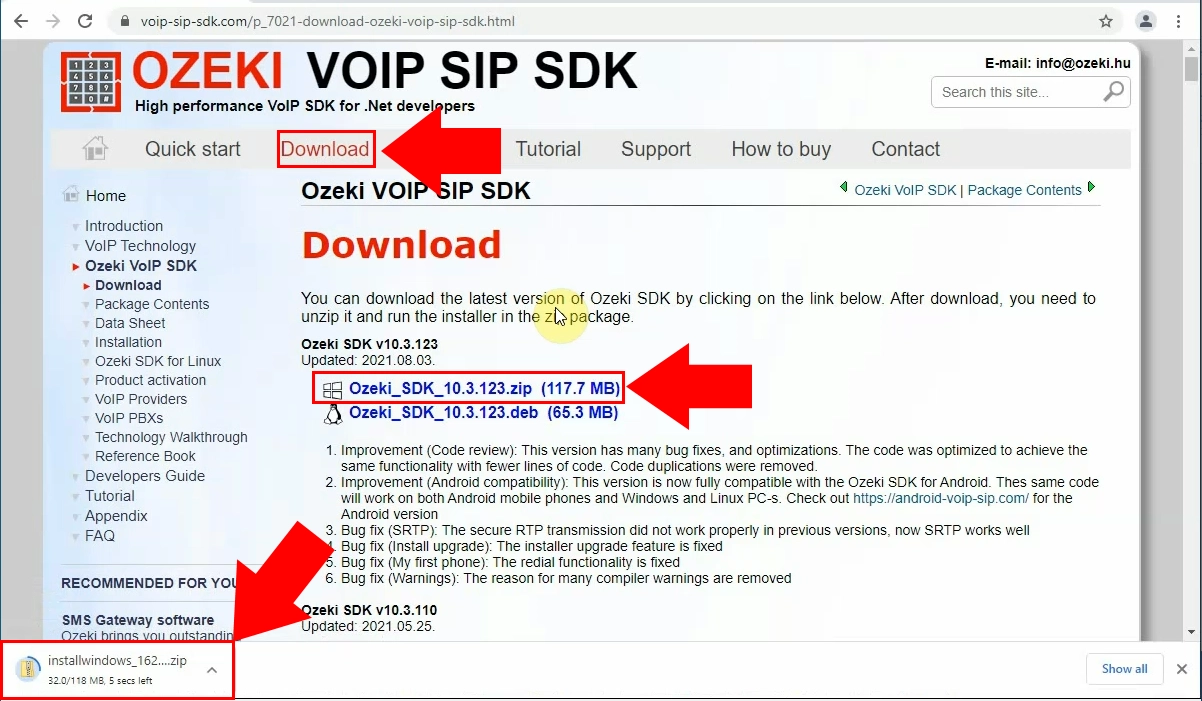
The first step of the installation process is to download the installer from the download page. Search for the Ozeki_SDK_versionnumber.zip link. Click it and your browser will download the files necessary for the installation process. As you can see, the progress of the download process will be visible at the bottom of the page. After you have downloaded it, click the file to open it (Figure 1).
Extract the zip file
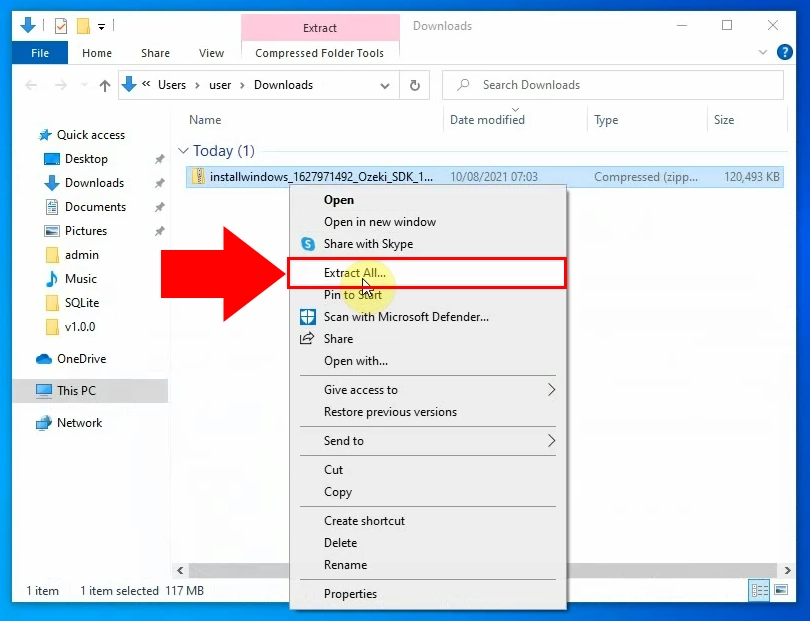
The next step is to search for the downloaded zip file. To start the installation process, you need to extract it. Right-click it to open the context menu of the zip file. There you can find the 'Extract All...' option. This will extract the compressed file into a usable '.exe' (Figure 2).
Start the installer
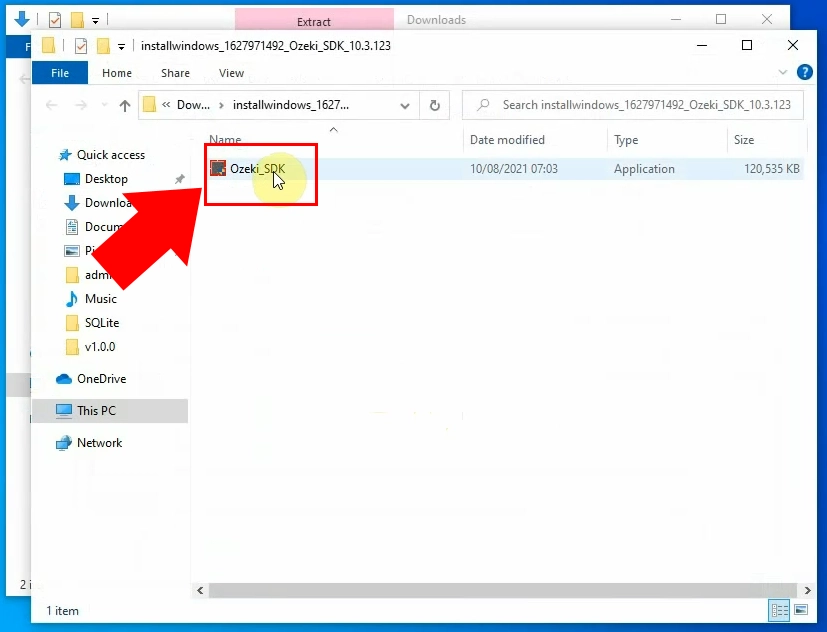
During the unzipping procedure, you defined a place where the unzipped installer file should be. Find this place and search for the installer. Run it by clicking it twice. It will start the installation procedure, which is a very easy task and it should not take more than 10 minutes. The file should be called 'Ozeki_SDK' (Figure 3).
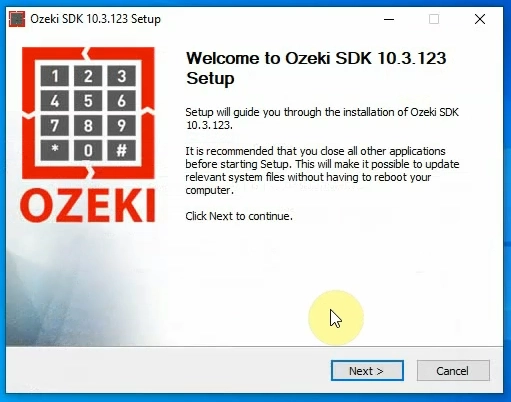
Here on Figure 4, you can see the first page of the installer. Here you can see some information about the process. If you wish to start the installation process, click the Next button (Figure 4). It will take you to the next step where you can modify any settings.
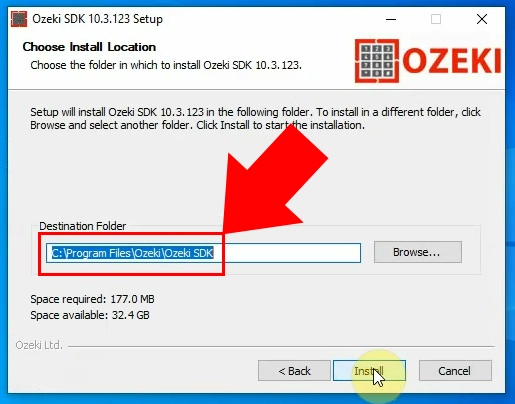
When you press the Next button on the Welcoming window, you get to another one that will allow you to select the installation folder for your SDK (Figure 5). The default folder for installation is the C:\Program Files\Ozeki\VoIP SIP SDK folder, but you can change this if you wish. When you selected the installation folder, there is only one step forward before the installation, you need to confirm it by pressing the Install button.
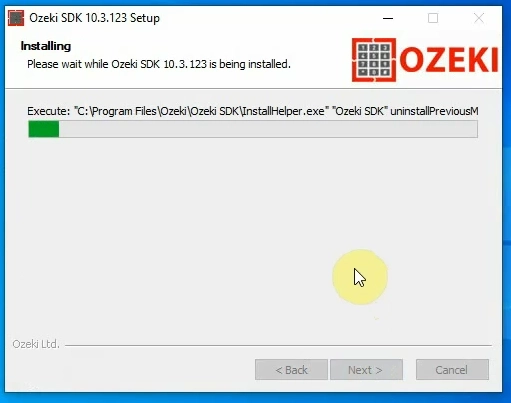
On Figure 6, you can see the progress bar of the installation process. When the progress bar fills up completely, you will have a working copy of the software. Until then, you can see the folder that the installer is working in above the progress bar.
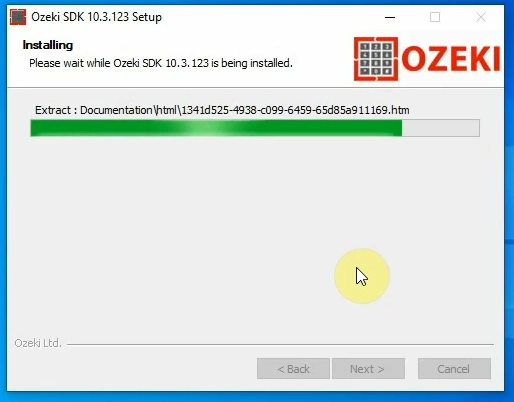
The installation time could depend on your hardware configuration. Wait for the progress bar to fill up and you software will be ready to use (Figure 7).
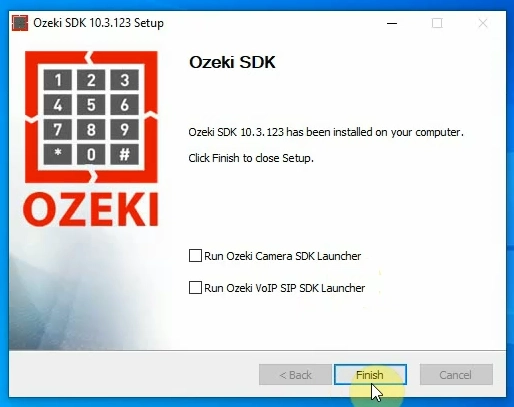
On Figure 8, you can see the last step of the installer. Here, you can choose to run the VOIP SIP SDK. Tick in the checkbox next to the option. If you have done it, click the Finish button (Figure 8). It will close the installer and open the software.
On Figure 9, you can see how the installed software's icon. It means that the Ozeki VoIP SIP SDK is installed on your computer. You can activate it with your activation code or you can try the example programs that were also installed with the SDK. You can find an Ozeki VoIP Examples link (Figure 11).

Summary
This article demonstrates how to install Ozeki VoIP SIP SDK on your computer.
You can select a suitable Ozeki VoIP SIP SDK license on Pricing and licensing information page
If you have any question or need additional information, please
contact us
at info@voip-sip-sdk.com
Related Pages
More information
- System requirements
- Sdk installation steps
- First voip sdk project


